This post was last updated on February 19th, 2021 at 05:32 am
Introduction
The @font-face rule allows a webpage to load custom fonts. Once a stylesheet has been applied, the rule tells the browser to download the font from where it is hosted and then to show it as defined in the CSS.
Our designs are related without the rule to the fonts that are already loaded on the device of a user, which differs depending on the system being used. Here’s a good rundown of fonts for the new method.
What fonts are available to use on the Web?
Technically speaking, to every website, you can add just about any font.
However, you always want to keep the price, the licence agreement, and the installation method in mind when looking for a font online.
Here are some of the most popular font libraries to help you find that perfect font without further doubt:
Google fonts have an extensive library of approximately 1,000 free licence fonts that can be browsed via their site interactive folders. Google Fonts are arguably the simplest fonts to add to your site because of their Developer API and where I would recommend starting your quest.

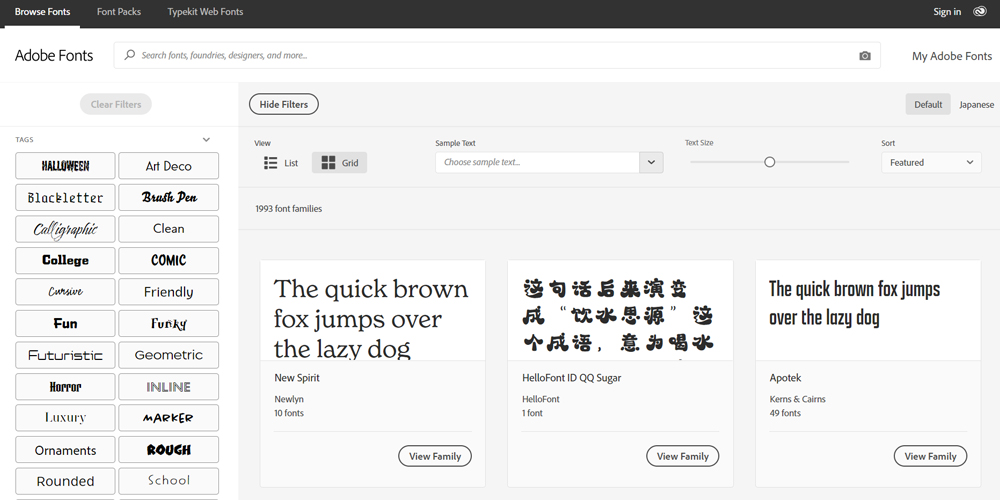
Adobe Fonts, (previously Typekit) offers a range of +14,000 impressive fonts. The new and enhanced service now provides subscribers of Creative Cloud with easy access to their entire font library by clicking a button. Adobe Fonts, unlike Typekit, has eliminated page view restrictions and made all their fonts available for both desktop and web use.
Note: Creative Cloud Subscriptions (Adobe Fonts) start at $20,99 /monthly.

Font Squirrel is well known for their Font Identifier and Font Generator, in addition to providing a range of free fonts approved for commercial work.
The Webfont Generator allows you to transform and transform any font you legally own (.ttf or .otf file format) into a functional WebFont Package that includes a Cascading Style Sheet (CSS) that is simple to use.

Browser Support Different Font Formats
Modern browsers have significantly enhanced how they support custom fonts over the past few years. Even today, however, not all formats on every browser are supported.
The most popular browsers are here and what font format they currently support:

In order to ensure your fonts are supported across all browsers, I will always suggest using TTF / OTF and WOFF.
Try Can I Use-A great tool to study feature compatibility across various browser versions (FREE) for more information on supported font formats.
How to add custom fonts using @font-face to your website
Step 1: Please download the font
Find the custom font that you want to use on your website, and then download the file format of the TrueType font (.ttf). The OpenType Font file (.otf) can also be downloaded.
Step 2: Build a cross-browsing WebFont Kit
Please upload your .ttf and .otf file to Webfont Generator and then download the Web Font Pack.
Step 3: Upload the font files to your website
Upload all the font files included in your Web Font Package to your website using your FTP or file manager. * This kit usually contains several file extensions, such as (.eot), (.woff), (.woff2), (.ttf) and (.svg).
A Cascading Style Sheet (.css) that you will need to update and upload in phase 4 will also be included in your pack.
* This phase can vary greatly depending on how you create and host your website.
Step 4: Upgrading your CSS file and uploading it
In a text editor, such as Text Edit, NotePad or Sublime, open the CSS file.
By uploading each file, replace the current source URL with the new URL that you have created.
By default, inside the downloaded Web Font Kit, the source URL location is set. You need to replace it with the location of your file.
Examples:-
Before update:
@font-face {
font-family: "yourfont";
src: url("yourfont.eot");
src: url("yourfont.woff") format("woff"),
url("yourfont.otf") format("opentype"),
url("yourfont.svg#filename") format("svg");
}
After update:
@font-face {
font-family: "yourfont";
src: url("<a class="vglnk" href="https://yoursite.com/css/fonts/CustomFont.eot" rel="nofollow">https://website.com/css/fonts/yourfont.eot</a>");
src: url("<a class="vglnk" href="https://yoursite.com/css/fonts/CustomFont.woff" rel="nofollow">https://</a><a class="vglnk" href="https://yoursite.com/css/fonts/CustomFont.eot" rel="nofollow">website</a><a class="vglnk" href="https://yoursite.com/css/fonts/CustomFont.woff" rel="nofollow">.com/css/fonts/yourfont.woff</a>") format("woff"),
url("<a class="vglnk" href="https://yoursite.com/css/fonts/CustomFont.otf" rel="nofollow">https://</a><a class="vglnk" href="https://yoursite.com/css/fonts/CustomFont.eot" rel="nofollow">website</a><a class="vglnk" href="https://yoursite.com/css/fonts/CustomFont.otf" rel="nofollow">.com/css/fonts/yourfont.otf</a>") format("opentype"),
url("<a class="vglnk" href="https://yoursite.com/css/fonts/CustomFont.svg#filename" rel="nofollow">https://</a><a class="vglnk" href="https://yoursite.com/css/fonts/CustomFont.eot" rel="nofollow">website</a><a class="vglnk" href="https://yoursite.com/css/fonts/CustomFont.svg#filename" rel="nofollow">.com/css/fonts/yourfont.svg#filename</a>") format("svg");
}
You need to upload it to your website (server) once you’ve updated the CSS file.
Step 5: In your CSS declarations, use the custom font
You can start using your custom font in your CSS declarations now that your Cascading Style Sheet and font files are uploaded to your server to help improve the look of your HTML.
This can be done in different ways, including adding to your main CSS file site-wide declarations.
Example:-
* {
font-family: 'yourfont', Arial, sans-serif;
font-weight:normal;
font-style:normal;
}
Here is a short list of top website builders and how Google Fonts are handled by them:
As you can see, a different approach is used by each website designer to add fonts that can vary from very simple to somewhat complicated.