Published - | Updated - February 14, 2021 04:21 pm
312 Views
This post was last updated on February 14th, 2021 at 04:21 pm
How to Install Laravel on Localhost XAMPP
At first, you must install XAMPP on your PC. to put in totally different versions of Laravel, the PHP version of your XAMPP program is extremely important.
To install Laravel, version 5.8 you need the following specifications:
Server Requirements
The Laravel framework has a few system requirements. All of these requirements are satisfied by the Laravel Homestead virtual machine, so it’s highly recommended that you use Homestead as your local Laravel development environment.
PHP >= 7.1.3
OpenSSL PHP Extension
PDO PHP Extension
Mbstring PHP Extension
Tokenizer PHP Extension
XML PHP Extension
Ctype PHP Extension
JSON PHP Extension
BCMath PHP Extension
How to Install Laravel step by step see the complete post.
Step 1:
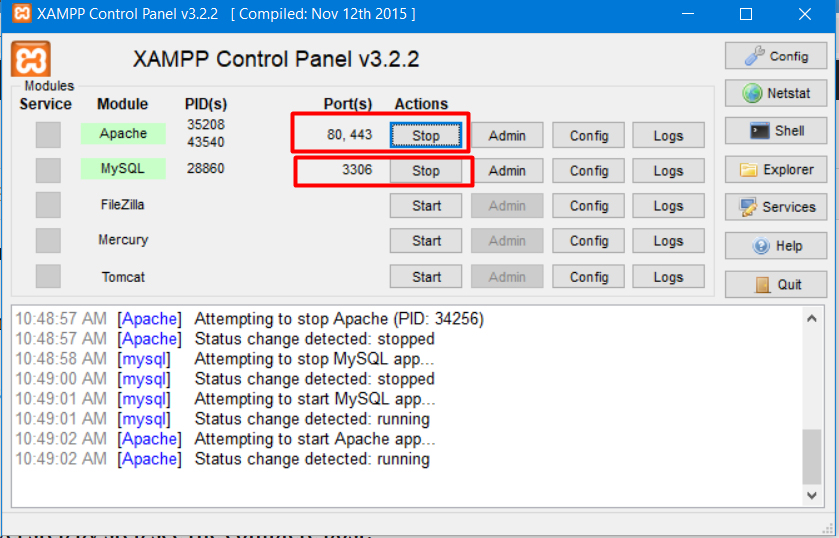
Open the your Xampp
Step 2:
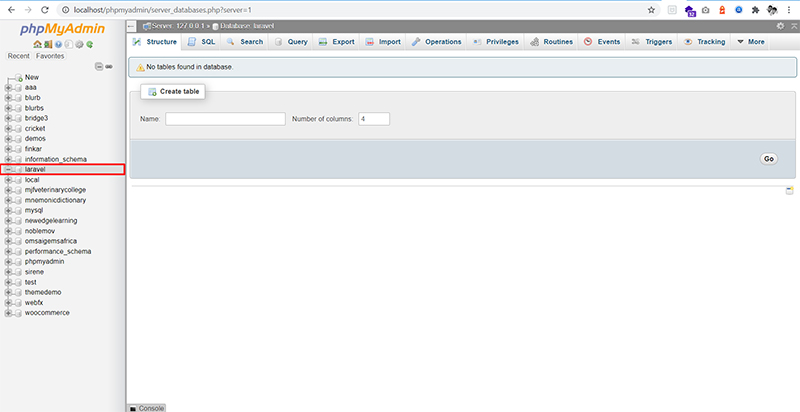
Also, to work with MySQL database, check localhost/phpmyadmin
That’s it. We successfully completed installing Xampp in Windows machine from scratch.
Now we are starting the local server or now we need to install the laravel composer
Step 3:
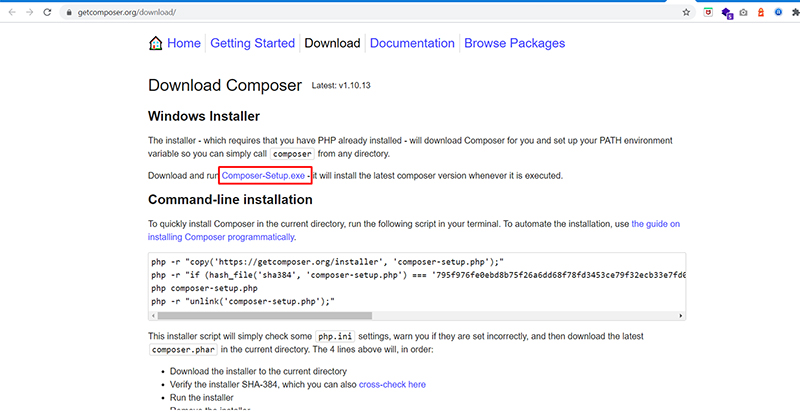
How to installing Composer
Composer, a PHP package manager has used manage Laravel dependencies. Hence it must installed before setting up Laravel. check the screenshot or click and download the composer exe file.
Now we are Started the Installing Composer:
You can install the Composer on your own. Here are the steps:
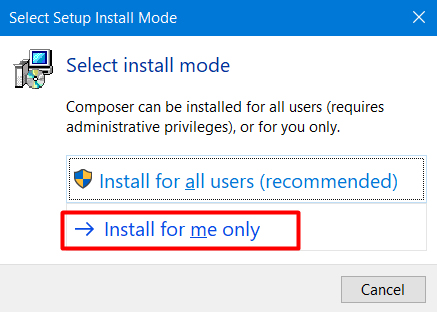
Step 4:
When you are click the exe file it is asking for the installing process, now you are selected the install for me only for use only your computer or you have server you selected the all users (recommended) as per you want you can use.
Step 5:
When you click on the downloaded installer, it will prompt the following screen. We don’t want to install the developer mode, so keep that unselected and click Next.
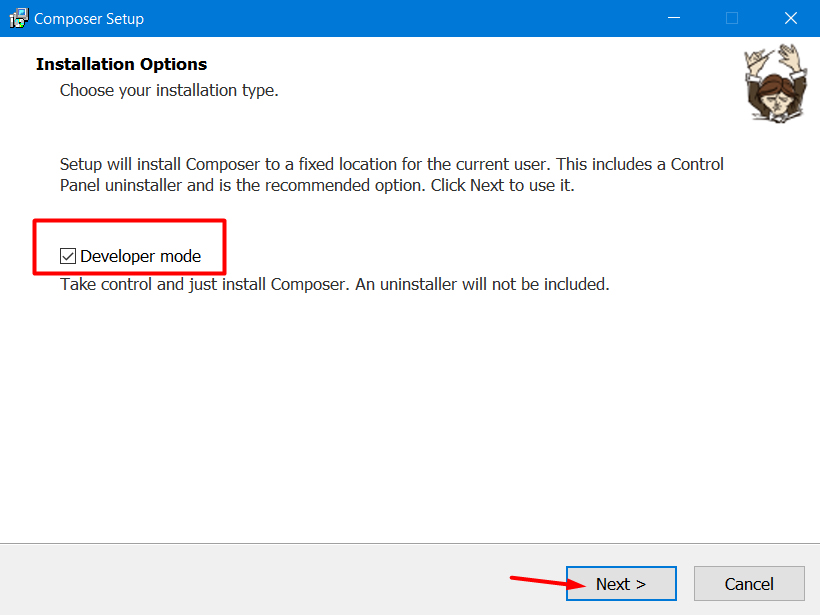
Then click next – next or install the default setup for composer.
See this is now installing
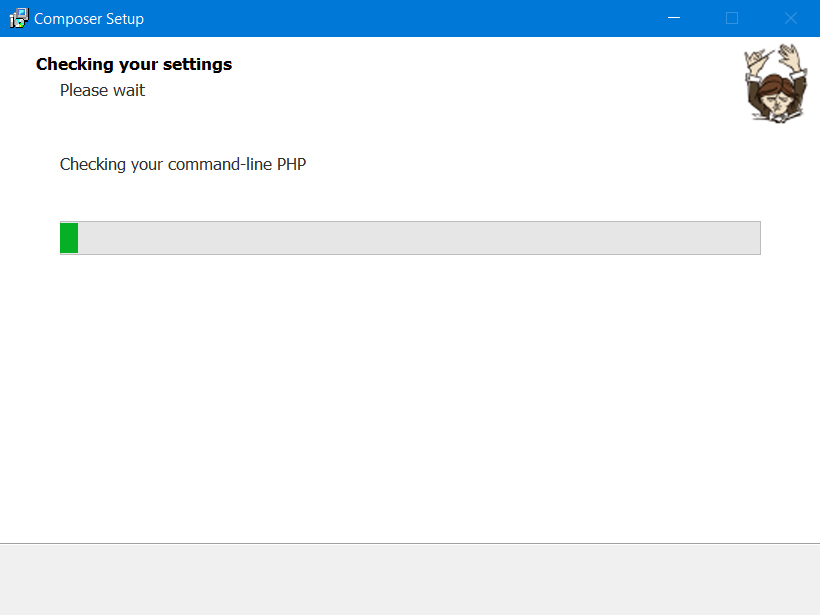
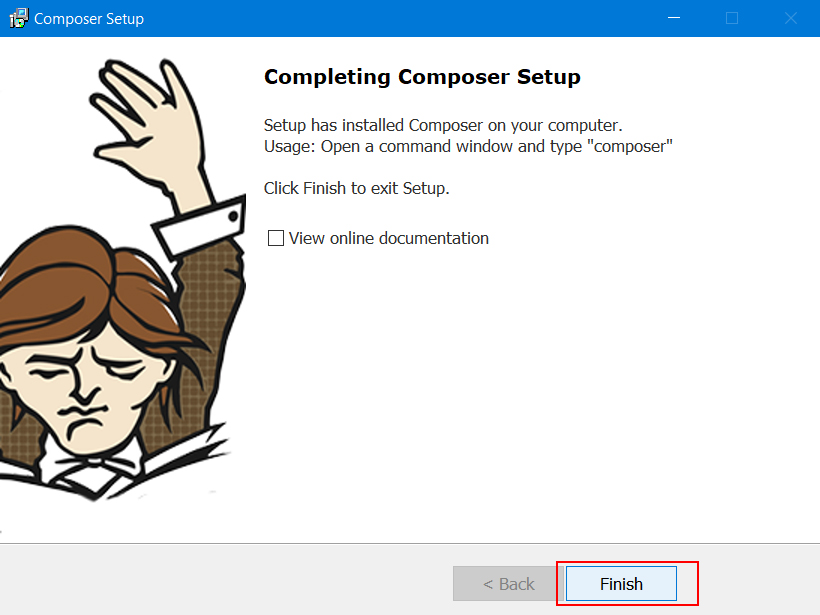
Step 6:
Composer setup needs to check the PHP configs, keep the default settings and click Next – Next. You are successfully installed the composer on you computer. Now you click on Finish button.
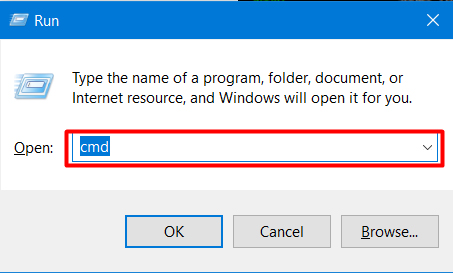
Step 7:
Now you needed to press the your keybord button press Ctrl+R then your computer screen open the run dialog box you type in the run command (cmd) or click on okay.
Step 8:
We can confirm the composer installation by running composer in the terminal or git bash. This command lists information and available commands in Composer.
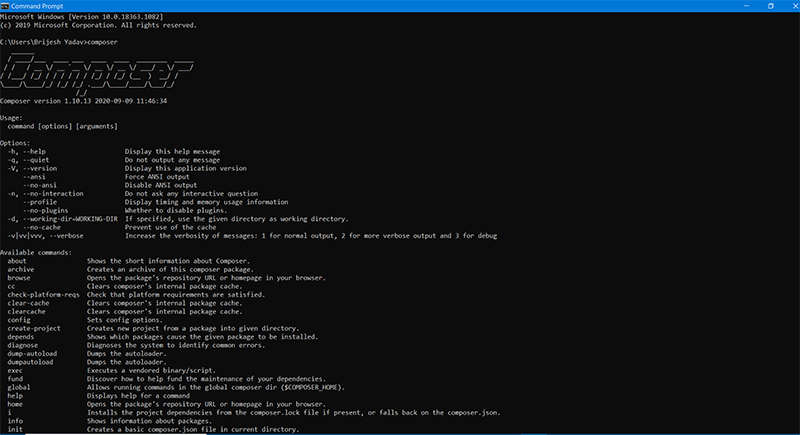
You see the above output, the composer is setup successfully.
Step 9:
Install Laravel
To install Laravel, we can Download the Laravel installer globally. Run it from any location:
composer global require "laravel/installer"Once this completes, optionally, you can go to C:\xampp\htdocs\laravelnamespace and create a new folder to keep your Laravel projects aligned.
And from that specific folder, open a terminal and run:
laravel new project-nameAlternatively, you may also install Laravel by issuing the Composer create-project command in your terminal:
composer create-project --prefer-dist laravel/project-name
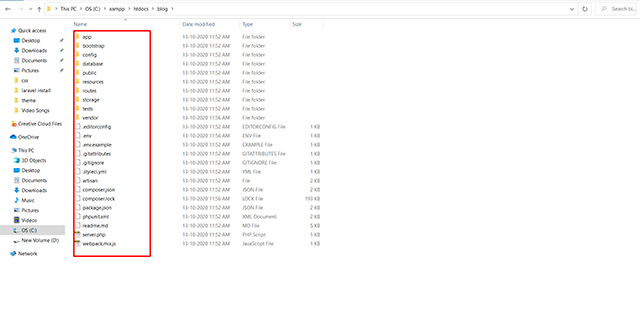
Optionally, you can also create Laravel project via composer:
composer create-project --prefer-dist laravel/laravel firstProjectAnd here’s the Laravel project directory schema.
Step 10:
How can you Run Laravel Projects
Make sure that Apache and MySQL are running in Xampp Control Panel. You can run Laravel projects in various ways. Let us discuss them:
1. Artisan command
The most arbitrary way to run Laravel projects is with artisan command. Artisan is Laravel’s inbuilt command directory.
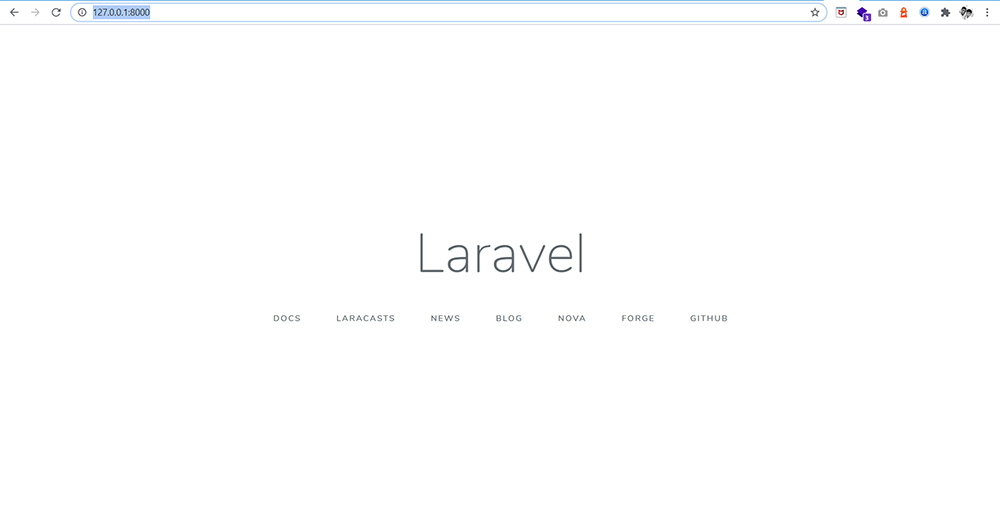
php artisan serve
And then, open the following link in the browser:
http://127.0.0.1:8000