
Published - | Updated - June 5, 2021 01:29 pm
241 Views

Hi Dev,
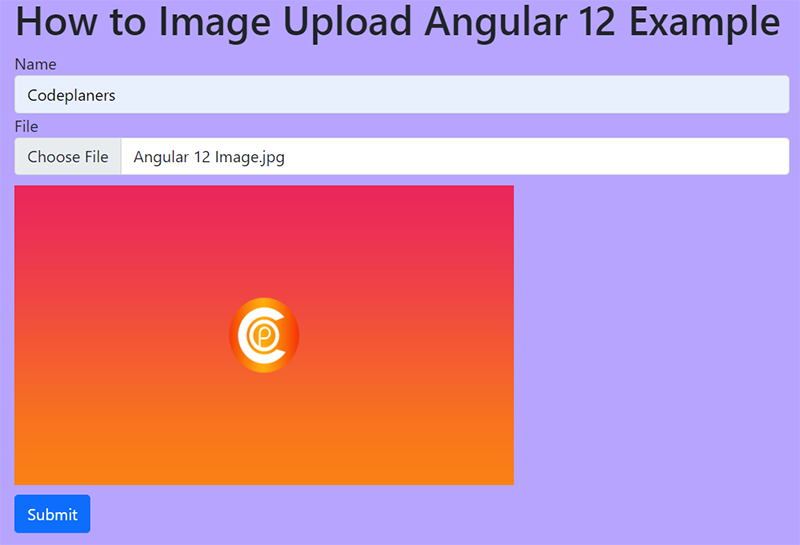
Today, i we will show you how to image upload angular 12 example. This article will give you simple example of how to image upload angular 12 example. you will learn how to image upload angular 12 example. So let’s follow few step to create example of how to image upload angular 12 example.
Step 1:- Create New Angular App
First of, open your terminal and install new angular app:
ng new my-new-app
Step 2:- Add Code on App.Module.ts File
Open src/app directory and open app.module.ts file. And add code into app.module.ts file.
First of, open your terminal and  install new angular app:
[code lang="js"]
import { BrowserModule } from '@angular/platform-browser';
import { NgModule } from '@angular/core';
import { HttpClientModule } from '@angular/common/http';
import { FormsModule, ReactiveFormsModule } from '@angular/forms';

import { AppComponent } from './app.component';

@NgModule({
  declarations: [
    AppComponent
  ],
  imports: [
    BrowserModule,
    HttpClientModule,
    FormsModule,
    ReactiveFormsModule
  ],
  providers: [],
  bootstrap: [AppComponent]
})
export class AppModule { }
Step 3:- Add Code on View File
Open src/app directory and open app.component.html file. And add code into app.component.html file.
<h1>How to Image Upload Angular 12 Example</h1>

<form [formGroup]="myForm" (ngSubmit)="submit()">

    <div class="form-group">
        <label for="name">Name</label>
        <input
            formControlName="name"
            id="name"
            type="text"
            class="form-control">
        <div *ngIf="f.name.touched && f.name.invalid" class="alert alert-danger">
            <div *ngIf="f.name.errors && f.name.errors.required">Name is required.</div>
            <div *ngIf="f.name.errors && f.name.errors.minlength">Name should be 3 character.</div>
        </div>
    </div>

    <div class="form-group">
        <label for="file">File</label>
        <input
            formControlName="file"
            id="file"
            type="file"
            class="form-control"
            (change)="onFileChange($event)">
        <div *ngIf="f.file.touched && f.file.invalid" class="alert alert-danger">
            <div *ngIf="f.file.errors && f.file.errors.required">File is required.</div>
        </div>
    </div>

    <img [src]="imageSrc" *ngIf="imageSrc" style="height: 300px; width:500px">

    <button class="btn btn-primary" type="submit">Submit</button>
</form>
Step 4:- Add Code On app.Component ts File
Open src/app directory and open app.Component.ts file. And add code into app.component.ts file.
import { Component } from '@angular/core';
import { HttpClient } from '@angular/common/http';
import { FormGroup, FormControl, Validators} from '@angular/forms';

@Component({
  selector: 'app-root',
  templateUrl: './app.component.html',
  styleUrls: ['./app.component.css']
})
export class AppComponent {
   imageSrc: string = '';
   myForm = new FormGroup({
    name: new FormControl('', [Validators.required, Validators.minLength(3)]),
    file: new FormControl('', [Validators.required]),
    fileSource: new FormControl('', [Validators.required])
  });

  constructor(private http: HttpClient) { }

  get f(){
    return this.myForm.controls;
  }

  onFileChange(event:any) {
    const reader = new FileReader();

    if(event.target.files && event.target.files.length) {
      const [file] = event.target.files;
      reader.readAsDataURL(file);

      reader.onload = () => {

        this.imageSrc = reader.result as string;

        this.myForm.patchValue({
          fileSource: reader.result
        });

      };

    }
  }

  submit(){
    console.log(this.myForm.value);
    this.http.post('http://localhost:8001/upload.php', this.myForm.value)
      .subscribe(res => {
        console.log(res);
        alert('Uploaded Successfully.');
      })
  }
}
Step 5:- Create upload.php file
Now we are ready to run example, i we will add api file using php. so you can add upload.php file with “upload” folder and run with different port and call it. so let’s add upload.php file as like bellow:
upload.php
<?php

    header("Access-Control-Allow-Origin: *");
    header("Access-Control-Allow-Methods: PUT, GET, POST");
    header("Access-Control-Allow-Headers: Origin, X-Requested-With, Content-Type, Accept");

    $folderPath = "upload/";
    $postdata = file_get_contents("php://input");
    $request = json_decode($postdata);

    $image_parts = explode(";base64,", $request->fileSource);

    $image_type_aux = explode("image/", $image_parts[0]);

    $image_type = $image_type_aux[1];

    $image_base64 = base64_decode($image_parts[1]);

    $file = $folderPath . uniqid() . '.png';

    file_put_contents($file, $image_base64);

?>
Step 6:- Run Angular App:
ng serve
Step 7:- Run PHP API
php -S localhost:8001