Published - | Updated - February 14, 2021 04:25 pm
223 Views
This post was last updated on February 14th, 2021 at 04:25 pm
To create custom menus is actually really simple. I used Twenty sixteen, WordPress’ default theme, to show you all the steps you need to take in order to build your own custom menus.

you want to add custom nav menu in your WordPress theme? Navigation menus are the horizontal list of links on top of most websites.
By default, WordPress themes come with pre-defined menu locations and layouts, but what if you wanted to add your own custom navigation menus?
In this article, we’ll show you how to easily create and add custom navigation menus in WordPress, so you can display them anywhere on your theme.
Custom Navigation Menus in WordPress Themes Crete
Nav menu are a feature of WordPress themes. Every theme can define its own menu locations and menu support.
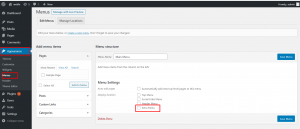
To add a custom navigation menu, the first thing you need to do is register your new navigation menu by adding this code to your theme’s functions.php file.
function register_my_menus() {
  register_nav_menus(
    array(
      'header-menu' => __( 'Header Menu' ),
      'extra-menu' => __( 'Extra Menu' )
    )
  );
}
add_action( 'init', 'register_my_menus' );
Custom Navigation Menus in WordPress Themes Displaying
Next, we need to display the new navigation menu in your WordPress theme. The most common place where navigation menus are usually placed is in the header section of a website just after the site title or logo.
However, you can add your navigation menu anywhere that you want.
You will need to add this code in your theme’s template file where you want to display your menu.
|
1
2
3
4
5
|
<?phpwp_nav_menu( array( 'theme_location' => 'my-custom-menu', 'container_class' => 'custom-menu-class' ) ); ?> |
The theme location is the name that we selected in the previous step.
The container class is the CSS class that will be added to your navigation menu. Your menu will appear as a plain bulleted list on your website.
All you need to ensure is that the theme_location points to the name you provided for your menu in the functions.php code above. (Note that it’s the header-menu being used here rather than Header Menu without a hyphen. Header-menu is the name that the code understands, Header Menu is the human-readable version that you see in the admin page.)
Nav menu, Your menu will appear as a plain bulleted list on your website.

You can use the CSS class .custom_menu_class to style your menus. Here is a sample CSS to help you get started:
|
1
2
3
4
5
6
7
8
9
10
11
12
13
14
|
div.custom-menu-class ul { margin:20px 0px 20px 0px; list-style-type: none; list-style: none; list-style-image: none; text-align:right;}div.custom-menu-class li { padding: 0px 20px 0px 0px; display: inline;} div.custom-menu-class a { color:#FFFFFF;} |